Tag Archive: li-po


Hello,

I have two keyfob cameras from Hobbycity, the old SD resolution ones. Their code is #7, the worst of the lot actually. #3 was far better.

These cameras have a built-in battery, that is a 1-cell Li-Po with 140 mAh capacity. You charge it from USB-port. As far as I know traditional USB ports supply maximum 500 mA current. So this would charge up in roughly 17 minutes. I am very unsure how good the battery charging circuitry is in the unit. I would assume not so good. The premature death of my battery underlined this thought.

I was reluctant to just dispose the unit. It costs 15 USD, so quite cheap. But why dispose something if there is a chance of mending it. So I tried.

The idea was to buy a small Li-Po battery (done), and some JST connectors. So that I could remove the small battery, solder on the JST female connector and then use the external battery with some adhesive velcro tape. Brilliant 🙂

I tried to solder the contacts onto the wires. These wires are very thin, so use a fine grade soldering iron. Mine is very coarse, had to be very cautious.

When you have soldered the wire onto the metal pin you have to push together the last portion that forms an open U-shape. Otherwise it will not enter the plastic connector housing.

Then I had to remove some material from the other half of the housing. To have a good support for the connector I removed a rectangular area.

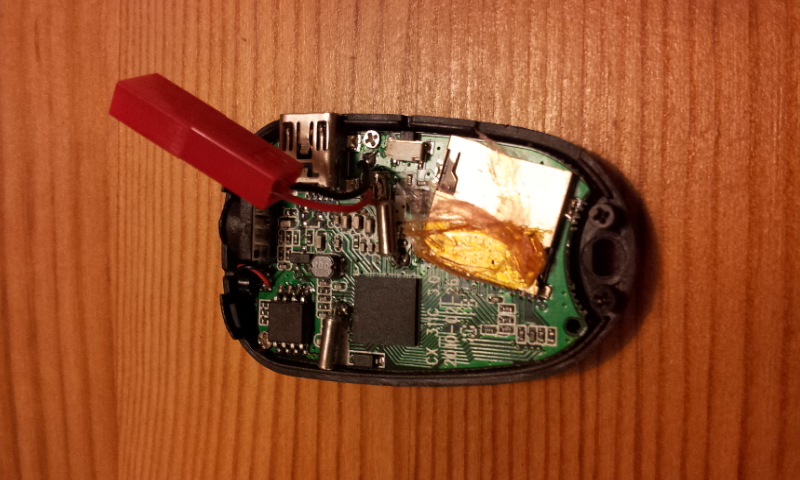
The connector fits nicely.

I double checked the polarity to be sure. Then I could assemble it and glue in the connector. It will be subject to some force when connecting and removing the outside battery. I used CA glue.

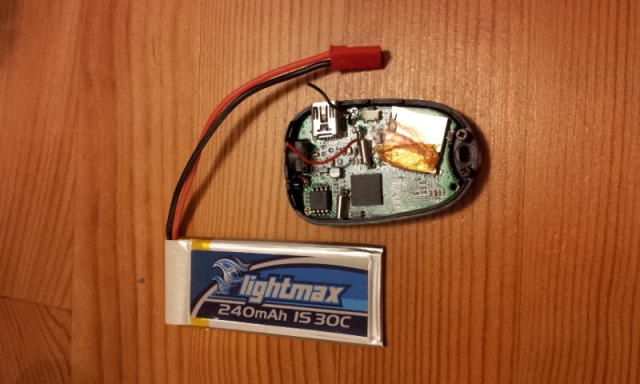
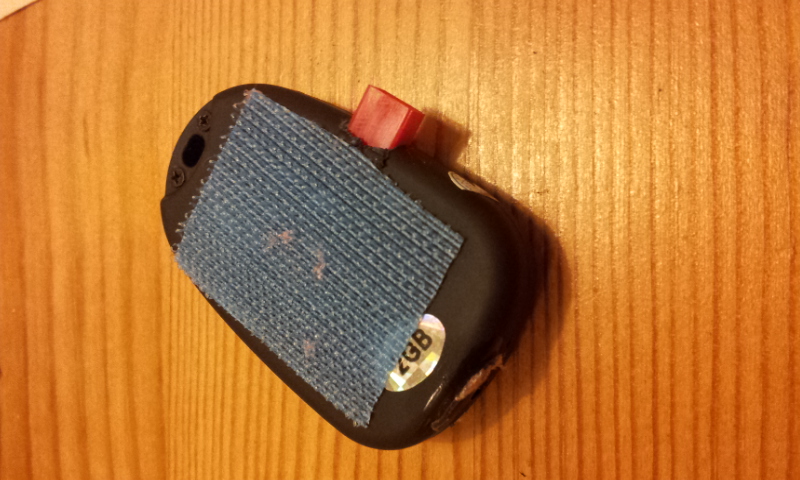
Just a size comparison, the new battery next to the camera unit. I will use adhesive velcro to fix it on top.

Maybe I will have the battery on the plane and the camera will sit on the battery. This way I will get better (less) drag coefficient. Important in flight.

I will need to do this on my other camera, that has reduced battery life. Probably will throw in the towel soon. Since this new battery is 240 mAh (vs 140 for the original) I will get significantly better battery life. And I can monitor the cell voltage with my Cell Voltage Monitor device. Important factor in keeping batteries healthy.

Best regards,

Sir Crash a Lot

Hello!

I just received my parallel charging board from Hobbycity. They were super fast, I expected the package for the end of this week, it arrived on Monday. Great service!

According to reviews it can happen that polarity is wrong on the connectors. This causes risk of permanent failure on the batteries that you connect to it. So it is a good idea to check connections and polarities prior to using this board.

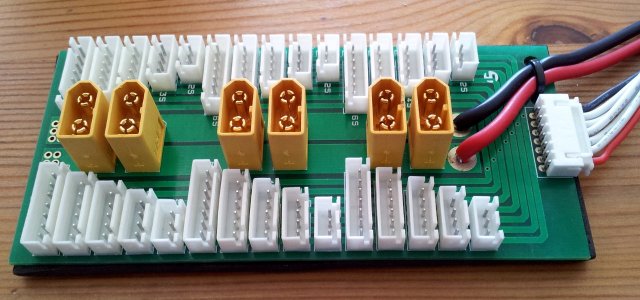
Mine looks like following after removing the isolation from the back.

From behind

And from above:

From above

I think that this looks okay. The red wire is connected to the plus side of the main XT60 connector. And all the charging XT60 connectors are on the same side, the side to which the red wire is soldered.

I checked if the balancing port ground wire is connected to the matching side of the balancing connectors. It looks like so.

I just double check this one more time and then will do a big charging of 6 batteries at once. Since I received my 3 new Zippy 3S 2200 mAh 20C batteries I can use 6 packs. I just made sure that they are all okay, checked the voltages.

One came with 2.2V on one cell, this I corrected to 3.8V with the storage charge option on the iCharger unit.

Later I will try to make a short resume of how you can do such a parallel charge and what do you need to look at to be on the safe side. I will update this very post to give you more details. Stay tuned.

Best regards,

Sir Crash a Lot


My charger arrived

Hello!

I was in a dilemma about chargers and PSU’s for some time, could not really decide. Now I made decision and ordered them.

I went for the iCharger 106B+ charger and a Lindinger 20A power supply unit.

I went for the iCharger since it is the best and this small model has just right performance for my needs. I plan to charge my batteries to storage charge on the long run and have a full charge prior to flying. This enables long life for them.

The 20A PSU seems to be too large for the 10A charger but the more power you have in the PSU the more stable voltage it can deliver during load condition. And the less it will use the fan for cooling itself. This seemed to be a good compromise in cost and performance.

I had my first charge recorded to show some interesting details.

The charger is quite heavy, you can feel that there is material in it. Good quality feel on the house, the connectors and the buttons. I have some plastic screen protection on the display, haven’t removed it yet. Like on mobile phones, you remove this on first use. This is no quality issue, I thought I might have it on for a while.

The PSU is cooled by a fan, the fan runs very smooth and quiet. I charged one battery so far at a time, we will see how it will run on more load. I plan to parallel charge several batteries at once.

The charger enables all sort of protection features. You can have time based protection, capacity based boundary condition. You can have temperature sensor readings and stop charging on some defined value. And you have the intelligent control of charge that checks all cells during the process.

When I charged the interior temperature of the charger went up to 41 degrees centigrade, this is not much I think. The fan ran quite seldom, noise level was not disturbing in a quiet living room. My wife was reading on the couch, no comments on her side.

What is annoying is the beeping, that you can disable. On default it beeps on every press of a button. That was commented on the side of my wife, she welcomes that muted beeps 🙂

I even did a storage charge, please see noise levels at that operation in following clip.

What next?

I will read the manual, that never hurts. And I will use parallel charge soon. Ordered a charging board from Hobbycity along with 3 extra batteries.

What I read is that you should check polarity on this board. Some of them are wrong polarity, you can damage your battery if you have a wrong polarity connection. I will check mine when it arrives.

I have 10A limit on the charger, this means that I can charge all 6 batteries together with 1.66A each. This is 0,75C charging, so it will take approximately 1.3 hours to charge all of them at once. Since I don’t discharge them fully I assume that maybe less time will be enough even.

With a 20A charger this would be even less time. But I am not in a hurry. Compared to the charger I used so far this is magic speed. The other charger took 6.5 hours per battery. That is slow.

I even have a battery monitor being shipped.

This small unit can display the voltage in all cells, you can check the status on the field. Can have it in the shirt pocket, a must-have almost. Costs 1.86 USD, that is almost like a box of milk that I drink every day. 3% and 1.5 liters costs approximately 12 SEK.

I can recommend:

– the charger,

– the PSU

– the milk even 🙂

Excellent news. My cell checker arrived even.


Best regards,

Sir Crash a Lot